Lopi 33 Elite....FIRE!!!!!!!

  • Active since 1995, Hearth.com is THE place on the internet for free information and advice about wood stoves, pellet stoves and other energy saving equipment.

    We strive to provide opinions, articles, discussions and history related to Hearth Products and in a more general sense, energy issues.

    We promote the EFFICIENT, RESPONSIBLE, CLEAN and SAFE use of all fuels, whether renewable or fossil.
Status
Not open for further replies.

PaulyV

New Member
Hearth Supporter
Dec 9, 2006
87
Ok...I had this all typed up...and for some f'n reason my pc froze..so heres another try..my sausage fingers are all cramped up now...
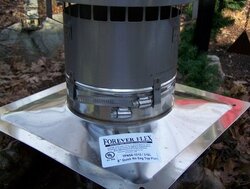
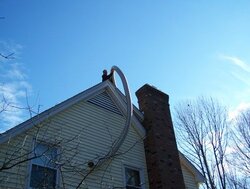
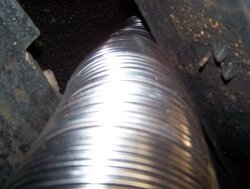
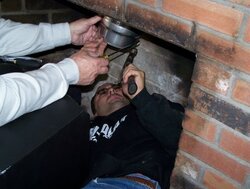
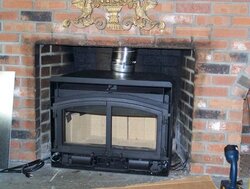
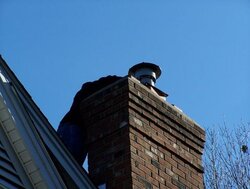
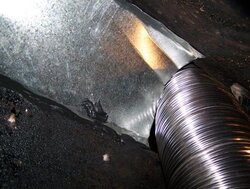
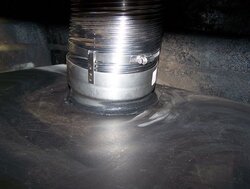
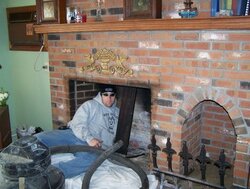
I did indeed install my Extrordinaire 33 yesterday, It was a great day! My Uncle and Cousin are here from Lewiston, Montana. They were eager to help me with the install. The liner went in in about 1 hour(total prep time and install) Used a rope and lowered it down. I pulled and Mike pushed from the top. No snotty hang ups, no F bombs.. :zip: like butta. I was amazed...still am. He came down and Big mike, me..and little Mike lifted the 450 lb beast to a dolly. Wheeled it to my steps into the breezeway(indoors) This connects to my kitchen and then the family room. Its 900 sq ft wide open. I placed a piece of 5/8" plywood as ramp over the steps. We placed the stove onto the plywood and walked her into the breezeway. We then lifted her onto the dolly for a smooth ride through the kitchen and into the family room. Total time so far 1.5 hours. (took a break to change the underwear after moving this sucker.) We then lifted her on the bluestone hearth and wiggled, jiggled it into place. Little Mike ran out and scaled the roof to push down the pipe as I pulled to lower it onto the stove....Boooya!..fit like a glove..(still shaking my head) Little mike cut the mere 6-8" leftover from the pipe, fitted the top hat on and siliconed it and clamped it in place. Done on top, 2 hours so far.
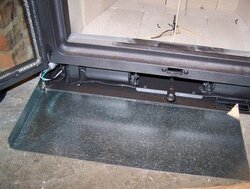
I know cranked up the barby and threw on half dozen porter house steaks/ several Sam Cherry Wheats, and grubbed for an hour...(my wife even cleaned up the mess, she likes doing that.....for real she does). All I had left to do was install the damper plate and surround...I was home free.....OR WAS I!!!!! TBC..Enjoy some pics..
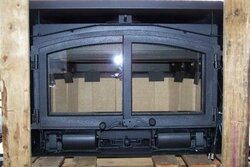
 

Attachments

  • Lopi 33 Elite....FIRE!!!!!!!
    100_0719.jpg
    32.3 KB · Views: 792
  • Lopi 33 Elite....FIRE!!!!!!!
    100_0724.jpg
    54 KB · Views: 759
  • Lopi 33 Elite....FIRE!!!!!!!
    100_0726.jpg
    32.4 KB · Views: 763
My house...me removing damper after cutting it out with sawzal...
 

Attachments

  • Lopi 33 Elite....FIRE!!!!!!!
    100_0730.jpg
    62.7 KB · Views: 745
  • Lopi 33 Elite....FIRE!!!!!!!
    100_0736-1.jpg
    38.3 KB · Views: 778
Bout time slow poke. J/K
Looks great man!!!!!!!!!!!! Glad it worked so smoothly for ya.
Wheres the fire man!!!!!!!!!!!!!!
Congrats
 
Little Mike...wrestling the snake. We ended up lowering it and had him keep the long end on the roofline..worked much better that way...
 

Attachments

  • Lopi 33 Elite....FIRE!!!!!!!
    100_0743.jpg
    31.4 KB · Views: 730
  • Lopi 33 Elite....FIRE!!!!!!!
    100_0745.jpg
    24.3 KB · Views: 743
  • Lopi 33 Elite....FIRE!!!!!!!
    100_0749.jpg
    29.9 KB · Views: 752
Thanks Wrench..its 76 in here right now...36 outside...sweet.....Hog lol.....I have way to many pics to post....trying to get to em in sequence...lol.....Stove cruisin at 425 now.......wife strippin... :coolgrin: ...may be a while....WHOOHOOOOOOOOO!!!!
 
Connections on all ends...top hat had silicone adhesive and was clamped for 30 hours...
 

Attachments

  • Lopi 33 Elite....FIRE!!!!!!!
    100_0750.jpg
    37.1 KB · Views: 764
  • Lopi 33 Elite....FIRE!!!!!!!
    100_0751.jpg
    23.7 KB · Views: 714
  • Lopi 33 Elite....FIRE!!!!!!!
    100_0754.jpg
    27.1 KB · Views: 713
OK......the damper plate was something different...my fat friggin fingers carved up 26 gauge that could make a path up and down my driveway 2 times.....(not really)...This took longer than the whole install,pipe/stove. A little frustrating but made it happen. Silly me didn't think and attached it all hig temp caulk and all...then had a bear of a time trying to maneuver the plates in place while securing. used a bit of kaewool here too. (used the stove as a break for the sheet)
 

Attachments

  • Lopi 33 Elite....FIRE!!!!!!!
    100_0758.jpg
    38.2 KB · Views: 691
  • Lopi 33 Elite....FIRE!!!!!!!
    100_0759.jpg
    43.3 KB · Views: 704
  • Lopi 33 Elite....FIRE!!!!!!!
    100_0765.jpg
    26.8 KB · Views: 712
Stainless plate above secondary tubes..There are firebrick ABOVE the steel plate....I did not know that... Just starting my first burn... The secondary burn is amazing.....lots of heat...zzzzzzzzzzzzzz
 

Attachments

  • Lopi 33 Elite....FIRE!!!!!!!
    100_0766.jpg
    26.1 KB · Views: 671
  • Lopi 33 Elite....FIRE!!!!!!!
    100_0774.jpg
    7.7 KB · Views: 707
  • Lopi 33 Elite....FIRE!!!!!!!
    100_0785.jpg
    9 KB · Views: 698
  • Lopi 33 Elite....FIRE!!!!!!!
    100_0782.jpg
    14.6 KB · Views: 715
Yeah brother ! We now have >>>>>>>>FIRE!<<<<<<<<<


BTW ----> WATCH OUT MAN ! There is some dude came down the chimney and going to steal you stove !!!!!

J/K ..........install and stove looks awesome .
 

Attachments

  • Lopi 33 Elite....FIRE!!!!!!!
    100_0736-1.jpg
    38.3 KB · Views: 612
Cass luvs it too...she crashed and was snoring so loud.....Life is good with a LOPI!!!!!
 

Attachments

  • Lopi 33 Elite....FIRE!!!!!!!
    100_0794.jpg
    22.5 KB · Views: 715
I did not see any Insulation wrap around the Single wall Flex liner ?
 
do not need any...
 
hearthtools said:
I did not see any Insulation wrap around the Single wall Flex liner ?

He has it sealed up top and block off plate below, from other vets words....not needed, dead air acts as insulation if I remember correctly.
But I ain't versed on code, so what do I know ;)
 
Heres a burn with all Rock Maple 5"rounds. stoves about 450 here..damped all the way down...all downstairs 77 degrees...
 

Attachments

  • Lopi 33 Elite....FIRE!!!!!!!
    100_0803.jpg
    10.8 KB · Views: 696
Inspector here says as long as I have a tiled chimney in good shape, block off top flue, bottom damper I'm code...safe..pass go..collect $100.00 jing a lings..
 
Hog Hearthtools is right. I have not hammered away at this for a while. In order to meet UL listing for most liners they are listed to be installed with insulation
Since this is the time of year for reflection. Many times it is impossible to get a 6" liner with insulation down an 8/8 or 8/12 flue the inside measurement of these flues is 6. 3/4 or 6. 7/8"

Most outside flexible liners exceed 6" add 1/4" insulation and wire mesh and in a perfect world it fits. But concret snots stick out.
All clay flue lined are not lined up perfectly, not all are straight runs. Code does allow me some discression to approve situations. In these cases ,
I know dead air space plays a part providing insulation. If I see a decent block off plate installation and seal.
Now if I see the liner installed in an exterior 12/12 flue, there is no excuse for not having insulation , there is plenty of room.

There is another option and I am going to ask that members debate this one

Is it better to install a 5.5" insulated liner in the 8/12 exterior flue Or the 6" liner not insulated.. Which code exception is the lesser of faults
the reduction of the cross -sectional code or the required Ul listing of insulation?

Regency supplies the 5.5" liner for the 6" flue collar stove?

BTW good job that insert looks good
 
Fist-o-Fury said:
do not need any...
No sure but MOST Liners need to be double wall or have an wrap to be UL 1777 listed or NPFA 211 compliant.
Check the Paperwork that came with the liner.
what I read in one copy of Forever flex instructions is a wrap is NOT needed if you know that the Chimney is built to code AND you are sure that the flue tile is in good shape. No one can tell if all the tiles in a 25 foot chimney is good or that you 1" clearance from combustables.

Most of the time the Warrantee will be void without a Flex wrap but NOT SURE ON Foreverflex.
Here are some topics on this

https://www.hearth.com/econtent/index.php/forums/viewthread/4167/

https://www.hearth.com/econtent/index.php/forums/viewthread/2634/P15/

The attachment is a copy of a instruction sheet online
unknown how old this is.
 

Attachments

  • Lopi 33 Elite....FIRE!!!!!!!
    forever.jpg
    35.1 KB · Views: 460
My opinion is that it depends on the climate and other factors...even the particular stove!

From the mason-dixon line south, installing without insulation would rarely cause draft problems.
Then there is matter of interior vs. exterior chimneys.

If the chimney has no flue tiles, then insulation would be very important just for the safety aspect.

All of these variables make these subjects hard to pin down. If my stove was less than 2.5 CF firebox, the 5.5 would probably work great. If it was a larger one, I might want the 6". Too many variables!

BTW, as to flues and their capacity, the multi-fuel boilers that we sold had about a 5.6" flue collar (6" outside) and they were lab tested to use BOTH wood and oil at the same time - say 240,000 BTU input. The only reason a lot of stove do no use 5" is that it is not a common size for pipe....so they use 6". There is not a scientific basis for the 6" in, for instance, a Jotul 602.
 
Yes the stove and install look great to me
OTHER THAN NO WRAP
but like the book shows if you have good TILE all the way up no need.

BTW for all you shopping for a stove like the stove installed here
Lopi Declaration Flush Wood Insert http://www.lopistoves.com/product.asp?dept_id=5&sku=109#
Avalon Perfect Fit Flush Wood Insert http://www.avalonstoves.com/product.asp?dept_id=5&sku=62
Fireplace Exrodinar 33 http://www.fireplacextrordinair.com/
are all built by Travis ind. and are basicly the same stove under a differnt name.
The big diffences will be the style of the faces.
You need to have a larger than normal fireplace for one to fit for they are a large insert that will take a 24" log.
Great insert But I have not sold one yet for there are not alot of people (in my area) that have a Fireplace that big or want to lay down just under $3k just for the insert not counting a reline.
 
Craig said it best each chimney has different factors that come into play And I have to use discression not everything is found in a book.
That's why I would like to see constructive discussion I probably should move it to a separate post
 
hearthtools said:
Fist-o-Fury said:
do not need any...
No sure but MOST Liners need to be double wall or have an wrap to be UL 1777 listed or NPFA 211 compliant.
Check the Paperwork that came with the liner.
what I read in one copy of Forever flex instructions is a wrap is NOT needed if you know that the Chimney is built to code AND you are sure that the flue tile is in good shape. No one can tell if all the tiles in a 25 foot chimney is good or that you 1" clearance from combustables.

Most of the time the Warrantee will be void without a Flex wrap but NOT SURE ON Foreverflex.
Here are some topics on this

https://www.hearth.com/econtent/index.php/forums/viewthread/4167/

https://www.hearth.com/econtent/index.php/forums/viewthread/2634/P15/

The attachment is a copy of a instruction sheet online
unknown how old this is.

I went with pre insulated double wall, not for clearance purposes, 11" x 11" inside clay liner, in excellent condition.
But it was easier being pre insulated. And I wanted smooth for easier cleaning, less ridges for creosote to grab ahold of.
I did use 5' of flex at the bottom, unisulated but also not past first flue tile.
 
Fist-o-Fury said:
Heres a burn with all Rock Maple 5"rounds. stoves about 450 here..damped all the way down...all downstairs 77 degrees...
Hey fist i see you have your thermometer on the door frame thats were i use to have it
until i found a better spot. Take off front face plate and mount thermometer on fire box on top
of doors on left or right side after grill is on you can see it thru grill i found you get a much better
reading.
 
That's a nice looking insert. I've sold a few of them but the price is a little discouraging for alot of folks. Though for design it's, in my opinion, the nicest looking steel stove on the market. I've always been a little turned off by the UBB style of most wood inserts. I would have to say that my favorite wood insert looks wise is the Jotul. I just really like cast. At any rate your install looks nice and I'm sure the stove heats nicely as well!
 
Status
Not open for further replies.