Jotul F600 needs another rebuild...

  • Active since 1995, Hearth.com is THE place on the internet for free information and advice about wood stoves, pellet stoves and other energy saving equipment.

    We strive to provide opinions, articles, discussions and history related to Hearth Products and in a more general sense, energy issues.

    We promote the EFFICIENT, RESPONSIBLE, CLEAN and SAFE use of all fuels, whether renewable or fossil.
  • Hope everyone has a wonderful and warm Thanksgiving!
  • Super Cedar firestarters 30% discount Use code Hearth2024 Click here
And the 24-22 is not the new casting number, thats the new date set up for when they changed how they date the runs of new cast parts. 24th day of 2022 is when that piece was cast. The lower part was cast on March 25 2003.

The actual part number is the same in each, 103885 12
 
  • Like
Reactions: paredown
As a former f600 owner, I congratulate you on all your hard work and perseverance. You are definitely better than me. After several issues with mine in about five years, I got rid of it and went with a welded carbon steel stove. A leaking seam in the middle of the heating season causing smoke to spill out during startup was the last straw for me. It’s just not practical to have to tear down and rebuild a wood stove regularly, especially in the middle of December.
If you take care of your stove it will last a lifetime. If you had smoke pouring out of the front, it sounds like you had draft issues, which could absolutly be compounded by lack of proper maintance.

Yes cast iron stoves require more maintance, but if you keep on top of it, or preferably have a professional stove tech do your maintance, it will last for many years. I regularly work on Jotuls made in the early 2000s, that are in great shape for their age.

But I also see many that have had issues go ignored for so long, that it dominoes into needing a full rebuild and major new parts.
 
Base assembled--I did not take a picture of the ash pan, but you can see the creosote buildup on the old base.
[Hearth.com] Jotul F600 needs another rebuild...
 
Re-reading this thread is causing a flare-up in my PTSD. You may recall I had three Jotul Firelights, albeit the older Firelight 12, from which the castings for your stove were derived. Between the need for full rebuilds (as you are doing now), and the absolutely insane months-long delivery times from Scandanavia, I had to keep three stoves in the house just to ensure I'd always have two operable. You'd have done well to snag that $1k unit, if you intend to stay with this exercise in self-torture.

The good news for you is that, while these cemented cast stoves are all maintenance queens compared to welded steel boxes, when it is repaired, at least it's a good performer. My F12's had some fundamental design flaws that, even when in good working order, limited my adoration of them. In a conversation with an engineer at Jotul many years ago, they told me the F600 used the same casting patterns as the F12, with modifications to accommodate the new internals.

Yes, the ash pan door was a constant point of worry, and in fact you'll find many prior Firelight owners just didn't use it, preferring to just let it pack solid with ash in an effort to prevent the leaks that cause the observed damage to the inner bottom. I always used my ash pan, actually thought it was a pretty nice system, but it did take extra attention and care with that gasket. And for the love of God, NEVER open that ash pan door after loading fresh wood, lest the gasket fail then, and turn your fully-loaded stove into a forge. I would only ever touch that door at the end of a load, emptying ashes BEFORE loading new wood.

Getting the gasket just right on the double doors also takes some attention, if I recall the middle seam used a different size (eg. 3/16") vs. the primary door gasket (1/4").
 
The “Ash housing gasket” is in the full $80 Jotul gasket kit directly from Jotul. It is not a piece I supply in my abbreviated OEM F600 gasket kit, simply because 99 percent of people do not need or use it, and (because of inflation and my prices going up on everything) I had to choose between raising my prices or trimming mostly unused gasket from the kits. I choose the latter.
....

The reason the old one did not look cemented on, is because they use self adhesive gasket in the factory for the ash housing. The stuff I supply for the housing on request is no self adhesive, because ive found cementing it in helps it hold up better.
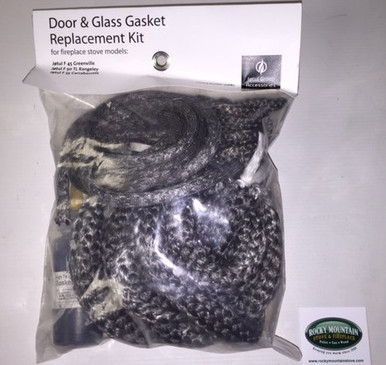
I bought the Jotul retail "Door & Glass Replacement Kit" (maintenance gasket set) from a Jotul dealer--and it does not list the ash pan gasket as included. I did figure out that 1/4" was the correct size. I didn't know there was a more extensive kit available.

Sorry for the bad phrasing--what I was trying to point out with the "not cemented" part of my statement was just that the seal of the ash pan housing relies on it's gasket and the four bolts and is not installed with furnace cement like other parts of the stove--and that I would strongly suggest that anyone rebuilding these stoves or who is a heavy user doing maintenance should drop the ashpan housing and replace the gasket.

I suspect (and I'm the first to admit that I am learning as I'm going) that some of the paranoia about the ashpan door not sealing should be redirected to consider possible leaks between housing and bottom plate--which seemed to be the case with mine.

Of course the top plate gasket is also not called out in the maintenance kit either--but if you are tearing your stove down, replace everything!
 
Last edited:
C
I bought the Jotul retail "Door & Glass Replacement Kit" (maintenance gasket set) from a Jotul dealer--and it does not list the ash pan gasket as included. I did figure out that 1/4" was the correct size. I didn't know there was a more extensive kit available.

Sorry for the bad phrasing--what I was trying to point out with the "not cemented" part of my statement was just that the seal of the ash pan housing relies on it's gasket and the four bolts and is not installed with furnace cement like other parts of the stove--and that I would strongly suggest that anyone rebuilding these stoves or who is a heavy user doing maintenance should drop the ashpan housing and replace the gasket.

I suspect (and I'm the first to admit that I am learning as I'm going) that some of the paranoia about the ashpan door not sealing should be redirected to consider possible leaks between housing and bottom plate--which seemed to be the case with mine.

Of course the top plate gasket is also not called out in the maintenance kit either--but if you are tearing your stove down, replace everything!
Do you have a picture of the maintenance kit you could send me? Im curious which one you bought, or what they sold you.

Years and years ago before I started selling gaskets. I would buy those Jotul-157050 gasket kits for rebuilds, and I could have sworn they had top plate and ash housing gaskets in them.

Crazy they dont supply the top plate gasket. But from what I remember there should be a bunch of extra gasket in that kit anyway.
 
C

Do you have a picture of the maintenance kit you could send me? Im curious which one you bought, or what they sold you.

Years and years ago before I started selling gaskets. I would buy those Jotul-157050 gasket kits for rebuilds, and I could have sworn they had top plate and ash housing gaskets in them.

Crazy they dont supply the top plate gasket. But from what I remember there should be a bunch of extra gasket in that kit anyway.
Funny--just came back to this--the part number on the one I'm using is 157050 (from the bag tag). I just looked on Rocky Mountain--and I see the one I have in hand for $65.22. (I ordered it online since our local dealer does not stock much.) It shows up in the link below, below the more expensive one.

I also see a second one listed for $99 and change (as you noted) with part number 157680:

So I guess I should have got the more expensive one--I didn't know there were two different kits!
 
Last edited:
Procedural question--would it be OK to set the back plate first--and then do the two sides and front at the same time?

(It also looks as though it would be easiest to attach the air channel plates to the top section before setting it, as you cautioned me to set the front inner piece and front together before installing it on the base.)

I'm using the cracked base in the workshop to dry fit--it looks as if setting the back would work, so long as I keep the bottom corners clean where the side panels need to fit into the base.
 
Funny--just came back to this--the part number on the one I'm using is 157050 (from the bag tag). I just looked on Rocky Mountain--and I see the one I have in hand for $65.22. (I ordered it online since our local dealer does not stock much.) It shows up in the link below, below the more expensive one.

I also see a second one listed for $99 and change (as you noted) with part number 157680:

So I guess I should have got the more expensive one--I didn't know there were two different kits!
No the second kit is only for the f45/50/55. Completely different rope.
 
Procedural question--would it be OK to set the back plate first--and then do the two sides and front at the same time?

(It also looks as though it would be easiest to attach the air channel plates to the top section before setting it, as you cautioned me to set the front inner piece and front together before installing it on the base.)

I'm using the cracked base in the workshop to dry fit--it looks as if setting the back would work, so long as I keep the bottom corners clean where the side panels need to fit into the base.
No, the order is:
Back->Inner Front->Sides->Outer Front
 
Last edited by a moderator:
No, the order is:
Back->Inner Front->Sides->Outer Front
THANKS! I can't believe I didn't check which stoves that second kit was for!
 
Re-reading this thread is causing a flare-up in my PTSD. You may recall I had three Jotul Firelights, albeit the older Firelight 12, from which the castings for your stove were derived. Between the need for full rebuilds (as you are doing now), and the absolutely insane months-long delivery times from Scandanavia, I had to keep three stoves in the house just to ensure I'd always have two operable. You'd have done well to snag that $1k unit, if you intend to stay with this exercise in self-torture.

The good news for you is that, while these cemented cast stoves are all maintenance queens compared to welded steel boxes, when it is repaired, at least it's a good performer. My F12's had some fundamental design flaws that, even when in good working order, limited my adoration of them. In a conversation with an engineer at Jotul many years ago, they told me the F600 used the same casting patterns as the F12, with modifications to accommodate the new internals.

Yes, the ash pan door was a constant point of worry, and in fact you'll find many prior Firelight owners just didn't use it, preferring to just let it pack solid with ash in an effort to prevent the leaks that cause the observed damage to the inner bottom. I always used my ash pan, actually thought it was a pretty nice system, but it did take extra attention and care with that gasket. And for the love of God, NEVER open that ash pan door after loading fresh wood, lest the gasket fail then, and turn your fully-loaded stove into a forge. I would only ever touch that door at the end of a load, emptying ashes BEFORE loading new wood.

Getting the gasket just right on the double doors also takes some attention, if I recall the middle seam used a different size (eg. 3/16") vs. the primary door gasket (1/4").
Very well put. I can’t attest to the double door gasket size but I agree with the rest of your post whole heartedly.
 
  • Like
Reactions: paredown and Ashful
Very well put. I can’t attest to the double door gasket size but I agree with the rest of your post whole heartedly.
Thanks. And my wife will tell you to never trust my memory on that gasket size, it has been a few years, and I've been known to mis-remember things.
 
Other jobs keep intruding--had to get the car through the test which meant a complete brake job and more.

Back at the stove--and have a couple of questions for those who have done this before:
  1. What size of bolts and nuts hold the exhaust flange on the back of the stove? (I'm down to random nuts and bolts--nothing I have left looks quite right);

  2. Center door gasket: from the Jotul kit, they call for 3/8" gasket for the main door channel (on both doors), and the included peel and stick 1/4" on the narrow center channel.
    This time I may have confused myself--I painted over where the gaskets were installed before, and can't remember if both doors get the 1/4" in the center.

    Facing the stove, the left door has an exposed channel clearly made for 1/4"
    Right door also has a channel that looks like it takes the 1/4" on the back side--so then closing the doors would put the two gaskets together to seal. So both get the 1/4" narrow center gasket?

    Or is it just the left door that gets the 1/4"?
 
1. M6-1 25mm x2 w m6 washer x2 on the inside in front of the nut.
2.Door gasket center only goes on the on the left door.
 
  • Like
Reactions: paredown and Ashful
Finished this up yesterday--I had no idea that getting the liner hooked up was such a PITA!
Still have to recheck the doors, and get a cap on the chimney.

Because I am so late, I've decided not to pull the new liner--our plan is to purchase a new Osburn, and probably get help with the liner. Instead, I have resealed the top of the old one, and will do the same with the block off at the bottom. Thanks to all who contributed--especially D. Hermit!

(Hurting your ribs is not conducive to muscling stuff around by yourself...)

[Hearth.com] Jotul F600 needs another rebuild...[Hearth.com] Jotul F600 needs another rebuild...
 
Such a beautiful stove. Surprised to see they kept the top-loader door handle on the F600... thought that was only an F12 thing.
 
  • Like
Reactions: paredown
Break-in fire going as I type. Got it up to 200 degrees with a small fire--no leaks, no smoke in the room, no visible cracks.
I am going to need better wood though, because I think the stove is MUCH tighter than it was.

Post-mortem:
  1. If you are going to DIY this--you need to order the full Jotul gasket set, and check your sizes. The kit lists some (but not all) and where they go. From the manual:
    Gasket List for the Jøtul F 600
    Description Size Length
    Right door, ld375 ø9,5 mm (3/8”) 900 mm (36”)
    Left door, ld375 ø9,5 mm (3/8”) 900 mm (36”)
    Left door, middle ld250 ø6,4 mm (1/4”) 410 mm (18”)
    Right glass, ld250 ø6,4 mm (1/4”) 1050 mm (42”)
    Left glass, ld250 ø6,4 mm (1/4”) 1050 mm (42”)
    Ash pan door, ld250 ø6,4 mm (1/4”) 1100 mm (45”)
    Right side load door, ld375 ø9,5 mm (3/8”) 1400 mm (56”)

  2. This will take a lot of stove cement. For convenience I used the black Rutland--I think I used 5 1/2 tubes of the stuff;
  3. If Jotul sells them, I would buy a set of new bolts and screws--or be prepared to spend condsiderable time cleaning everything up before reusing. While you could pick up standard metric cap screws with shoulders, my local hardware did not have them. And on the same topic, the exploded parts diagram in the manual shows the screw type, but not size, so you might want to make yourself a tray or cardboard and track them as you take them out--or note sizes on the diagram;
  4. Any place that you are screwing into the cast iron, you should get yourself a set of metric taps and carefully clean out every thread before reassembly. (Standard practice on car restorations--but absolutely worth it on these stoves.);
  5. The rear stand up plate on the back with the serial # is easily pop riveted back into place;
  6. The biggest struggle is to get the back, sides and front together. Because of the flare on the top of the body, you can't just slot the sides into place--and the biggest PITA is that the front has both the flared top edge AND a curved channel along the bottom front, so you can't slide it from left to right.
    I finally got it together, but it was not pretty--I left the back loose, and followed the order suggested above--back>LH side>front>RH side. I don't really know how I finally got it together--some hitting with a block and hammer was involved.
    (if I were building these in a factory, I would build these upside down, and drop the gooped up bottom onto the assembled and braced sides/front/back...)
  7. Where I broke bolts in the top lid on disassembly, I drilled out the broken bolts, tapped them to M8 the best I could, then used some thread-certs I got on Amazon that were M8-M6 (they are fragile) and then used M6 bolts like stock for reassembly.
  8. I used the Rutland Flat Black 1200 degree paint--the new parts already had a coat, so a pint was enough for a second coat on those, two coats on everything that was visible, with a little left over. I'm getting a bit of off-gassing as it cures but not too bad...
 
Last edited:
Second break-in fire going as I type. And thanks again to the people who weighed in with helpful comments and encouragement.

One last comment on rebuilding before I get on to the wood problem--

9. If you are rebuilding one of these, make sure you drop the ash pan housing and replace the gasket between it and the base. And I think it might be worth doing when you replace the door gaskets as part of your normal maintenance routine. As noted above, this is 1/4" gasket.

I can see how someone might be tempted once they got down to the base and legs to ignore that gasket--but from what I could see on our stove, having a good seal there is critical to maintaining temps and getting a clean burn.
Yeah, I think that ash pan to base seal is a real fatal flaw of these stoves, as they age. None of the maintenance procedures, which discuss door and top gaskets at length, seem to even mention the presence of a gasket between the ash pan and base. I suspect more than one failed Jotul Firelight (12 AND 600) could be blamed on this ash pan to base seal.
 
  • Like
Reactions: paredown
Yeah, I think that ash pan to base seal is a real fatal flaw of these stoves, as they age. None of the maintenance procedures, which discuss door and top gaskets at length, seem to even mention the presence of a gasket between the ash pan and base. I suspect more than one failed Jotul Firelight (12 AND 600) could be blamed on this ash pan to base seal.
The ashpan door has a tricky seal too. I found our F400 ran better when the ash was allowed to accumulate and cover the grate. And this was a new stove. The combination of sealing up that area and the added insulation of the ash bed helped extend the burn and provided peace of mind for protecting the stove base.
 
  • Like
Reactions: paredown and Ashful
Yep, you definitely want to mind that ash door seal. More than just being tricky, a gasket cement failure here at the wrong time is a serious "oh chit" scenario. After one scary incident early in my usage of the Firelights, in which I had some trouble getting the door re-latched after opening, I made it a point to never touch that door with fresh wood in the stove. I would only open it after a load had burned down, just in case something went wrong with getting it closed and sealed again.

The fatal flaw of this design is that the ash pan completely fills the cavity into which it slides. If even a small amount of ash falls down thru the grate while the pan is out, then sliding the pan back into the tray will cause the ash to compact at the back, and won't let you close the door properly. They'd have a much better and safer design if they just made the tray an inch deeper than the pan, but they didn't.
 
  • Like
Reactions: paredown
Yep, you definitely want to mind that ash door seal. More than just being tricky, a gasket cement failure here at the wrong time is a serious "oh chit" scenario. After one scary incident early in my usage of the Firelights, in which I had some trouble getting the door re-latched after opening, I made it a point to never touch that door with fresh wood in the stove. I would only open it after a load had burned down, just in case something went wrong with getting it closed and sealed again.

The fatal flaw of this design is that the ash pan completely fills the cavity into which it slides. If even a small amount of ash falls down thru the grate while the pan is out, then sliding the pan back into the tray will cause the ash to compact at the back, and won't let you close the door properly. They'd have a much better and safer design if they just made the tray an inch deeper than the pan, but they didn't.
This has been my practice as well--only clean out the ashes in the morning when the stove is cold or close to it.

The ashpan door has a tricky seal too. I found our F400 ran better when the ash was allowed to accumulate and cover the grate. And this was a new stove. The combination of sealing up that area and the added insulation of the ash bed helped extend the burn and provided peace of mind for protecting the stove base.

And I fully agree with begreen that leaving a layer of ash/unburned bits in the bed of the stove gives you a better burn--not surprisingly, now that I have scrutinized the manual--this is what the manual states as best practice.
 
  1. If you are going to DIY this--you need to order the full Jotul gasket set, and check your sizes. The kit lists some (but not all) and where they go. From the manual:
    Gasket List for the Jøtul F 600
    Description Size Length
    Right door, ld375 ø9,5 mm (3/8”) 900 mm (36”)
    Left door, ld375 ø9,5 mm (3/8”) 900 mm (36”)
    Left door, middle ld250 ø6,4 mm (1/4”) 410 mm (18”)
    Right glass, ld250 ø6,4 mm (1/4”) 1050 mm (42”)
    Left glass, ld250 ø6,4 mm (1/4”) 1050 mm (42”)
    Ash pan door, ld250 ø6,4 mm (1/4”) 1100 mm (45”)
    Right side load door, ld375 ø9,5 mm (3/8”) 1400 mm (56”)
You won't find any other kit that Jotul sells that will have it all. Better off reaching out to me directly if you need a gasket kit for an entire rebuild. The manual's list is missing the ash housing gasket(1/4ld), top plate gasket which is 3/8ld, smoke outlet gasket 1/4ld, and top cover gasket 3/8ld.