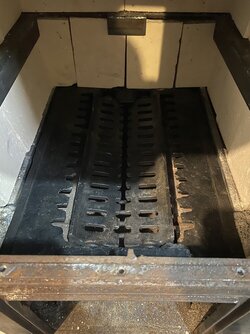
Remove the liners and brick the sides. 1 1/2 angle iron around top if needed to hold in place. The brick forms the hopper. No need for air through the sides since all air needs to come up from the bottom.
Any kind of angle iron frame to support grates is fine. Just make sure if they don’t fit the area close enough to the sides and front you leave no opening around grate frame for air leakage.
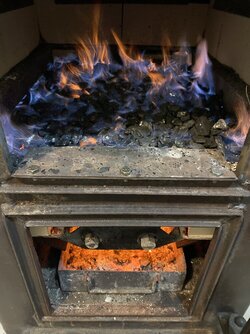
The chimney provides the low pressure area making a vacuum at the stove collar. Atmospheric air pressure PUSHES into the air intakes below grates and ALL the air must go through coal bed to ignite coal. Any leak around it, the air takes the path of least resistance and is not forced through the coal bed. It won’t start or burn correctly. That is the secret burning coal. Lots of air through it, and it takes off with very little small pieces of dry kindling. If it takes more than 10 minutes to get coal burning you’re doing something wrong. You want strong flames like a torch ripping up through the coal. Many make the mistake of establishing a wood fire and think they can switch over to coal by pouring it on hot coals with a little flame.
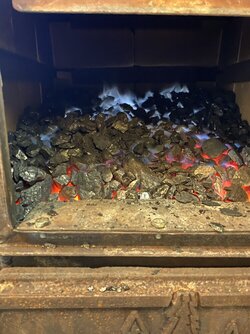
I put paper and cardboard strips across the firebox, then short small pieces of kindling front to back. Sprinkle some coal over it before lighting so all the heat generated starts heating the coal right away. When the flames are ripping upward, slowly add coal, just enough for flames to get through it, not slow it down. Within minutes coal will start to glow and any blue flames are a sign of ignition. You’ll know in minutes how a coal stove is going to work by the design of air flow. Once started it’s very strange to keep shoveling coal on top like your putting it out with dirt. You will only see the glow from the bottom. In time small areas of glow will cover the entire bottom. Once established and covered make sure there is a hollow light area for the flame to start and fill that way keeping one area light for a pilot flame. The more air you give it, the more blue flames on top. Flicks are like idle, steady low flame is medium, and blue flames reaching near the top is high.
With any coal stove the main object is keeping ash from touching grates! Airflow coming up through them cools them, and when allowed to get too full any will melt. That’s the killer of coal stoves, not emptying ash daily.
Use a barometric damper in the connector pipe to control draft. Coal requires constant precise draft. When starting I use something to hold the damper shut. This is the open position calling for more draft. You need lots of air up through it when starting, and many open ash pan door to get it going. A lazy wood fire takes forever, make it rip through the coal and it will ignite easily. You can always have an unsuccessful attempt, but when you do it correctly once, slow starts are behind you.
I use one match every year at the beginning of November and fill once, shake twice and it goes until I leave it go out. From a full hopper, only shaking to clean ash and not adding any burns about 3 days. The difference is the steady heat. With wood it may be burning, but not heating the area. Coal is more constant heating well almost until it needs to be shaken and kicks right back up. You will notice stack temp will be like a wood stove, very high when starting. Once switched to coal temp will drop to about 150*f and not much more than 200 running hard. That is the efficiency difference burning coal with very little loss up the stack. If you don’t get similar results, the grate and flow through coal bed is not correct.


