New to the site...
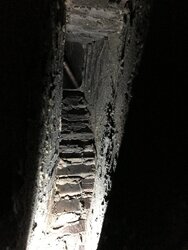
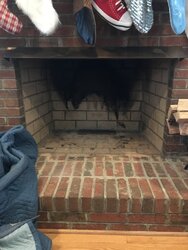
I have a new to me Jotul F400 Castine I’d like to install in an existing fireplace. The fireplace has a 33” x 5.5” damper. Above that is a masonry smoke shelf that’s a hair over 6” deep and gradually widens to a 12” x 12” clay lined chimney flue. The manual says I can do a direct connect and exhaust at the bottom of the clay lined section… But all of the local shops tell me to line the chimney for ease of cleaning, better draft, and a host of other reasons.
A few questions on this intstall:
Can I simply ovalize the bottom 4 feet of liner? If so what do I use to connect the oval liner back to my 6” round stove pipe below the damper? Or should I remove the damper/brick to stay round all the way to the top of the chimney? Ideas? Thanks!