Used with permission from member Trader Gordo!
Partly because I'm too cheap to pay for overpriced parts, and partly because I just like making things, the following is my guide to building your own firebrick and refractory parts. This may not be worth it to some
People since the castable refractory is kind of expensive and you may end up with a lot left over that you will never use. In my case I wanted the castable anyway for another project (home/backyard
Foundry for metal casting) so it didn't bother me to buy a big bag, and the truth is with
Vermont Castings current high prices for replacement parts, you could still save a lot of money anyway. In this example, I build a replacement "Load Door Refractory" piece for a Dutchwest 2479 woodstove.
My wife likes using the stove, but she isn't always so careful. In this case, after repeatedly slamming the door against a log, the refractory piece cracked in half (rolling eyes). Anyway, I wanted to order a replacement, but balked at the ridiculous price Vermont Castings wanted for it.
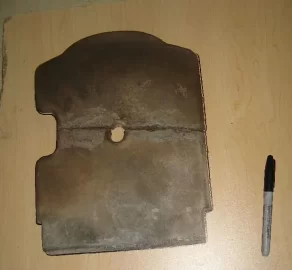
First of all I should say that much damage can simply be repaired, you dont always have to build a whole new part. And sometimes cracked parts don't even really NEED to be repaired necessarily. Rutland sells some good products for repairing damaged firebrick, in fact you can probably find their refractory repair product (in a tube, works with caulk gun) on clearance as the winter season ends. I picked up two tubes from Home Depot for 50 cents. Follow the instructions, you need to wet the existing refractory before applying, you can stick both halves of a broken piece of refractory back together again with this stuff and it will hold pretty well. But in my case, this piece continued to fall apart several days after repair, so I knew I had to replace it.
OK - so you want to make your own replacement part. First you need castable refractory with insulating properties. Dont use concrete - it can explode when heated. You could use another Rutland product, they sell their own castable that can be found at many retailers that sell Rutland products.
But it's more cost effective to buy a bag of castable refractory direct from a manufacturer. There are several
Manufacturers, and I think every state has at least one distributor. AP Green/North American Refractories/Harbison walker, has an online location search (click locations, distribution centers at the top of that page).
You can also just use superpages.com to search on refractory, to find local suppliers.
There are many products that should work; based on my research heres a partial list:
KAST-O-LITE 22 Plus
KAST-O-LITE 23 LI Plus
KAST-O-LITE 26 LI Plus
KAST-O-LITE 30 LI Plus
KAST-O-LITE 97-L Plus
GREENLITE 23 LI Plus DS
GREENLITE-45-L Plus
GREENLITE 75-28 Plus
GREENLITE-45-L AL Plus
GREENLITE CASTABLE 22 Plus
Sparcast LC32-AL
With Kast-O-Lite, the number in the name represents the temperature it's rated to go up to, so 26 is good for 2600 degrees F (which should be fine). 30 goes to 3000 degrees, but does not insulate as well as 26 so there is no reason to pay extra for it.
I picked up a 55 lb. bag of kast-o-lite 26, it was about $35 and is enough to make many custom pieces. It also came with a separate printed set of mixing and use instructions. Someone told me you can also use a product called "mizzou" which costs a little more but may be less susceptible to cracking at high temperatures - something to consider.
You can see that the original piece cracked in half. I tried multiple times to fix it using Rutland
refractory cement, but that failed after just a couple days use every time.
I also discovered that I could hold it all in place just fine and use it as is with a large metal bracket and a replacement, longer, 1/4 inch bolt:
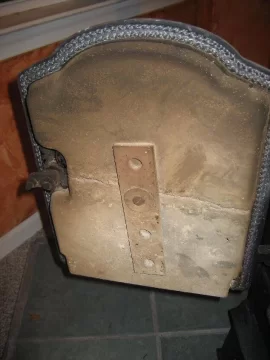
I found this metal bracket at Home Depot. This works fine, and will be my backup, but I still wanted to make a replacement refractory piece. However I think I will keep using the large metal support brace in the future anyway because it adds a little extra protection over this piece to help prevent wood from banging directly against the refractory and causing cracks as well as holding the thing all together if it does in fact develop cracks.
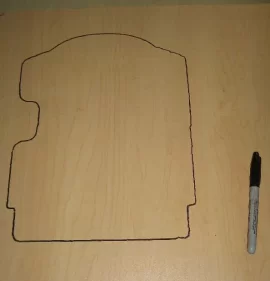
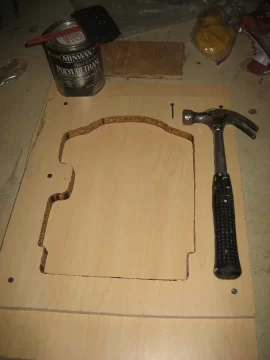
To build your form, start by finding some wood that is the same thickness as your refractory piece, and trace out your pattern. I had some scrap wood that looked fine for the job.
Here's the traced out refractory piece. For some reason I forgot to trace out the circle in the middle, don't forget that!
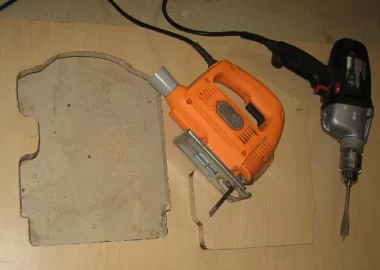
Drill a hole in the wood (INSIDE of your pattern) just large enough so you can get your jig saw blade in there, and then cut it out. Go slow and do it right the first time. You may want to drill more holes to make cutting sharp turns a lot easier.
Screw (don't nail like I did) the pattern down to another piece of scrap wood. Optionally apply a sealant (such as polyurethane, or even paint) especially if your wood is porous.
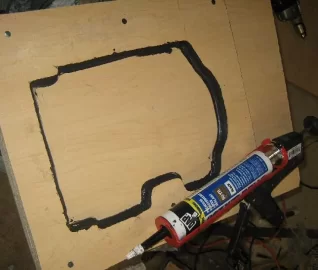
Use silicone sealant all around the bottom of the pattern, and smear the sides of the pattern as shown. You want it pretty nice and thick in the corners. This will make removing your finished piece without damaging it MUCH easier. I didn't do this the first time, and you can see I cracked my frame trying to get the piece out. The second attempt was a breeze using this method.
I greased the whole form bottom and sides, with vegetable shorting. I wasn't taking any chances the second time, and I think this may have really helped to make it come out so easily.
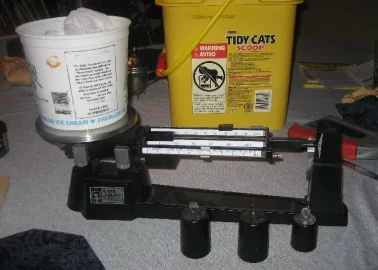
Not shown, but now you need to figure out how much castable refractory mix you need. One way to do this is to put a plastic bag (like a garbage bag) into your form, and fill the bag with the dry castable refractory until it fills the form. Now you have to decide if you want to "guesstimate" how much water to add, or go to the trouble of calculating exactly how much to add. I did the later, and this is how: Take that bag of mix and weigh it. If you have a small scale like mine, you might have to break it into two parts to weigh it. With the particular mix I was using, you are supposed to add 20% water by weight. So I measured the weight minus the weight of the containers, took 20% of that number, and measured out the proper amount of water (also subtracting out the weight of the container).
Follow the directions of your particular castable refractory mix, but in general you just add the water and mix THOROUGHLY for about 3 minutes, then start pouring it into your form. STOP when you are about HALF WAY to the top of your form. Now is the time to add reinforcing material (scrap metal). I highly recommend first creating a wire frame around the entire outline of your piece, you can use a metal coat hangar for this. You could use coat hangers for the whole thing, it will be even stronger if you twist the pieces together and add criss-cross pieces that are also twisted (or welded) to this outline frame. I didn't quite go that far though, I just did the outline, and then added scrap nails (which were actually collected from the ashes of my fires after burning pallet wood that has lots of nails in it - I remove all of the nails from my ashes using a powerful retrieving magnet). Here is a picture after filling the form half way and adding my reinforcing metal:
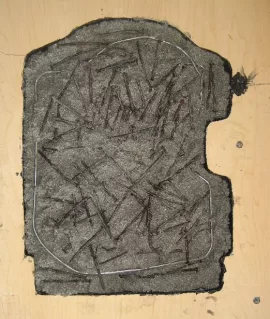
Next fill it up to the top, try not to go over the top. They say not to trowel it smooth (I'm not sure why) but you can smooth it out nicely and remove air bubbles simply by carefully dropping it a few inches above a smooth flat surface. You should do this for a couple minutes to remove air bubbles. Of course if you have a vibrator plate or something else that vibrates that you can put the form on, all the better.
Note that you can also add a little something to the middle of the form before you pour in your mix, to create intentional holes (if your piece has holes). In my first attempt I used a little piece of PVC for this, and a piece of wire stapled to the form to hold it in place:
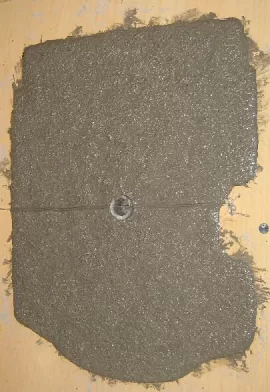
This actually worked quite well. Unfortunately in the second round attempt, I totally forgot to do this, so instead I just traced out where on the form the hole should go after it was done drying, and I used a grinder to slowly grind out the hole. This also worked, even though I had to grind right though some of my metal reinforcement. I'd say it's better to use the PVC or similar trick and pour right around it, creating the holes from the start instead of making them later. Don't forget to grease anything you put into the form!
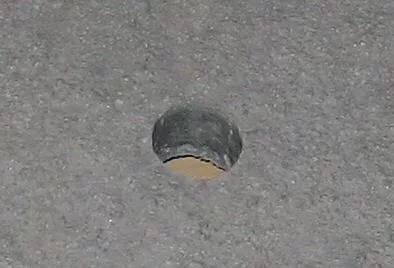
Dry the whole thing overnight. Follow the directions that came with your mix. Mine said optimal drying temperature was around 100 degrees, so I left it overnight under my stove where it is approximately this temperature. When ready, gently pry the form apart from the base. Note it would make a lot more sense to use screws instead of nails, in which case you'd just unscrew it and remove the back, but for whatever stupid reason I nailed them together.
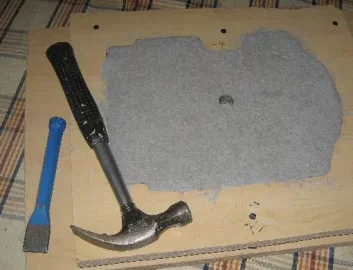
At this point you should be able to remove your finished piece pretty easily from the form if you followed my advice of using silicone sealant and grease. Don't try to push it the wrong way, it should pull forward out of the form. If it's stuck, you can turn it over, put some scrap wood around the edges, place your cutout over the refractory piece to spread the pressure evenly over the whole piece, and then gently apply pressure to it to push it out like this:
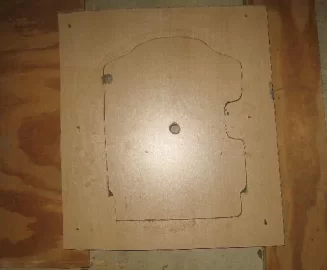
Install your new refractory piece!
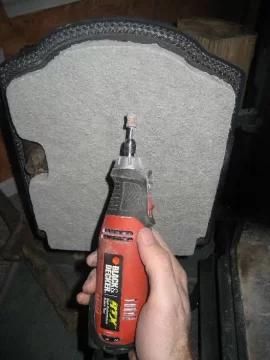
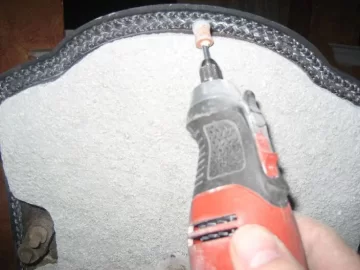
You are going to have some rough edges. You might smooth them with a file or sander of some kind, I used this dremel like rotary tool with a grinding attachment:
OK - just when you thought it was done... actually you have to CURE this thing. You should follow the instructions that came with whatever mix you used. It's probably best to do this in an oven, following the directions to a tee. Although I must admit I cured mine using my woodstove and obviously didn't follow the instructions very well. The most important thing is that you don't just stick it into a raging hot stove. You could build a series of fires starting very small, trying to maintain a low temp, or sticking it in after you have a bed of coals that isn't excessively hot, etc. There are many ways to do it, just don't bring the temp up too hot until all the water is boiled out or you will crack it. This was one more mistake I made with my first attempt. Also, do not attempt to just stick it on top of your stove, because it will stink up your whole house. So hopefully by now you've learned from all of my mistakes and you can do it right the first time. My second attempt seems like a real success, I guess time will tell how well it actually holds up.
-Gordo


