Century S244 install in fireplace

  • Active since 1995, Hearth.com is THE place on the internet for free information and advice about wood stoves, pellet stoves and other energy saving equipment.

    We strive to provide opinions, articles, discussions and history related to Hearth Products and in a more general sense, energy issues.

    We promote the EFFICIENT, RESPONSIBLE, CLEAN and SAFE use of all fuels, whether renewable or fossil.
Status
Not open for further replies.

19glendale

Member
Feb 1, 2015
38
Northern Virginia
It was a lot of planning and work...

Had to order it from Menards in Ohio. $700ish including shipping; will have $300 off that from tax credit. Stores in VA are way over priced, little options, and much like a mechanic who tries to sell you everything and knows nothing nuanced about your situation. Had the chimney swept professionally, they removed about a 5 gallon bucket worth of dry ash from the smoke shelf; I removed a good amount more after with shop-vac.

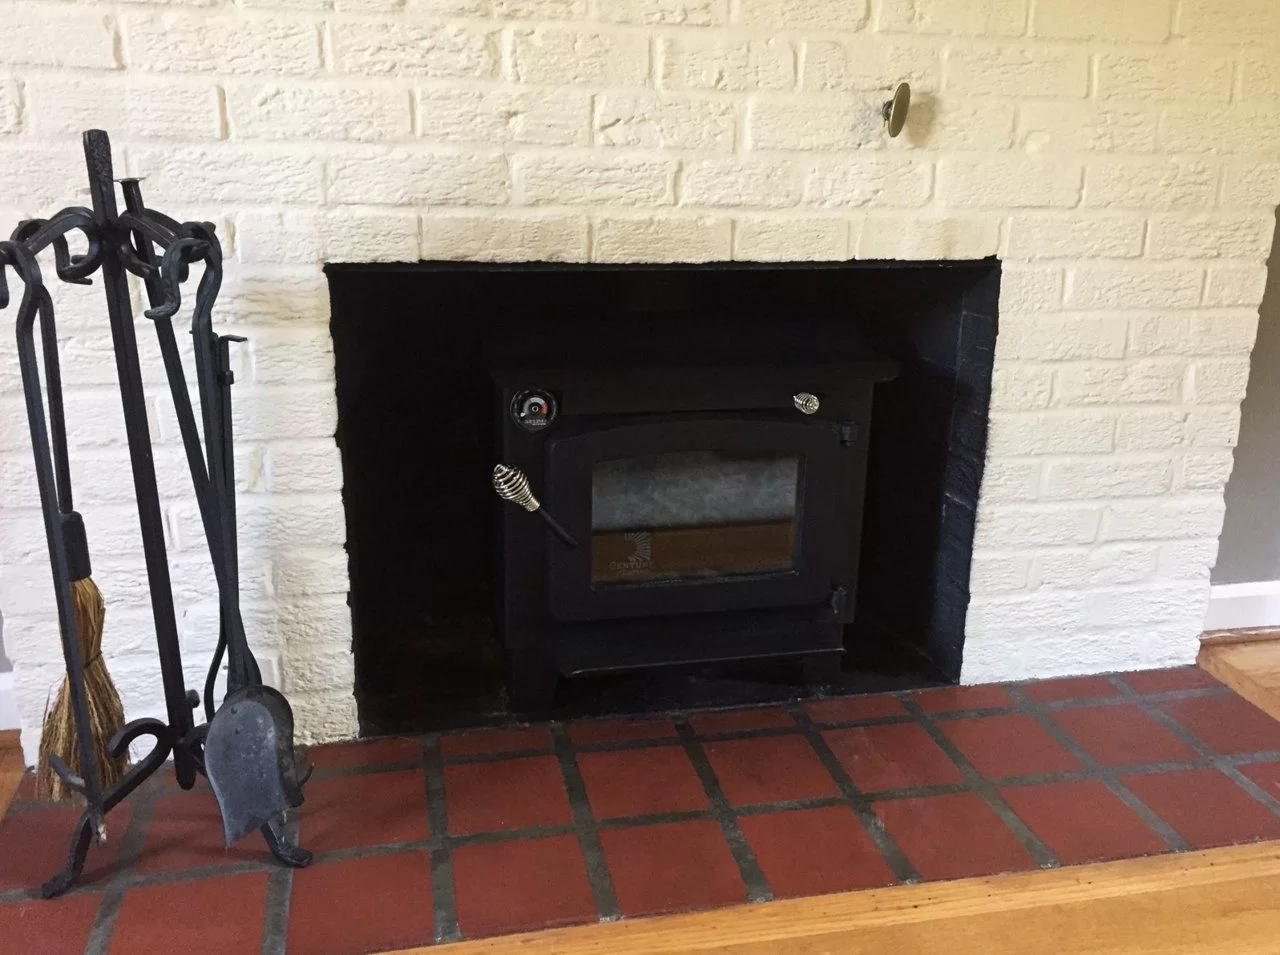
Cut about 3" off legs with angle grinder, repainted bottoms of legs.

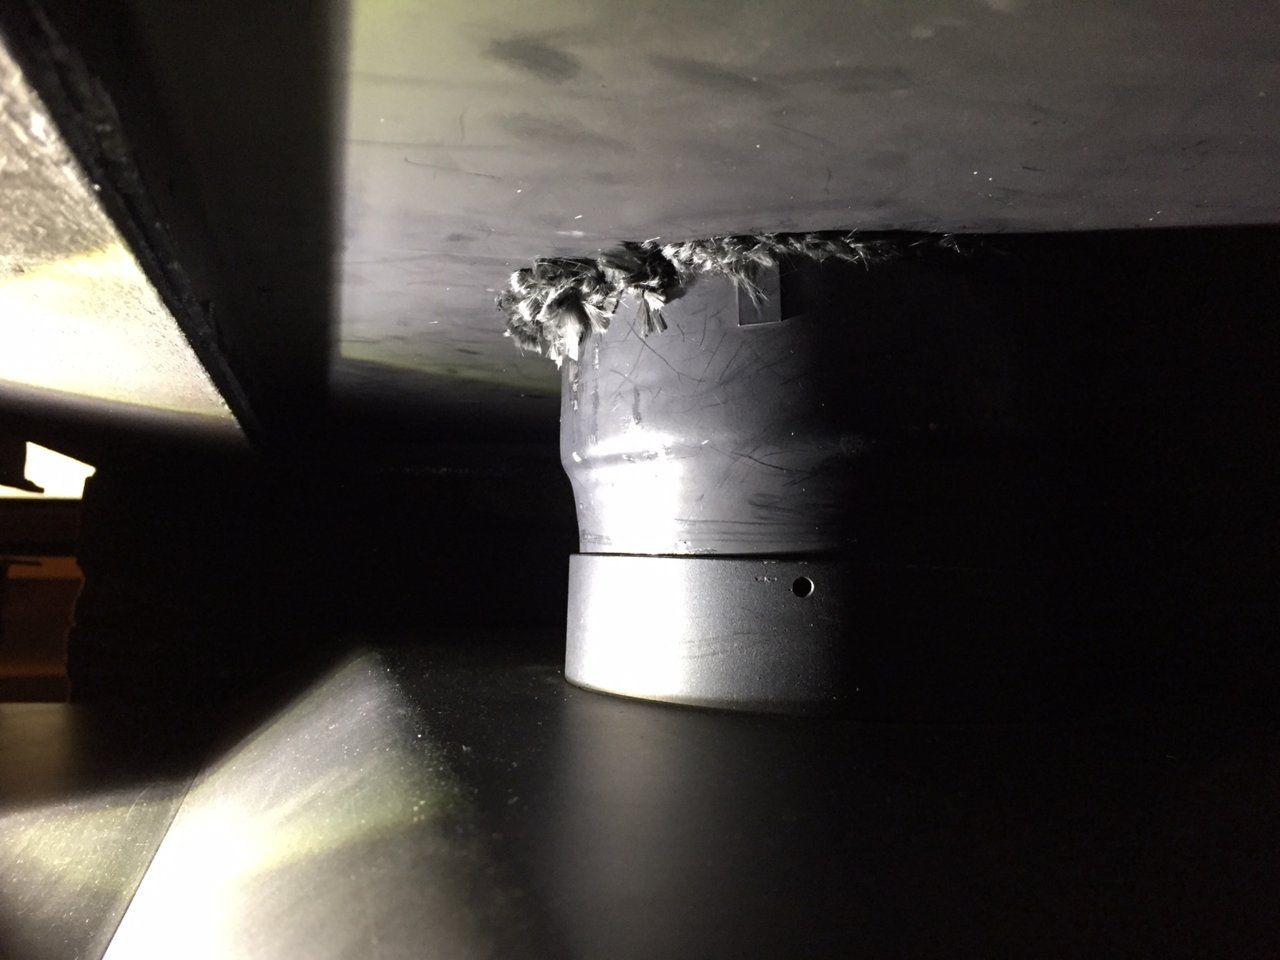
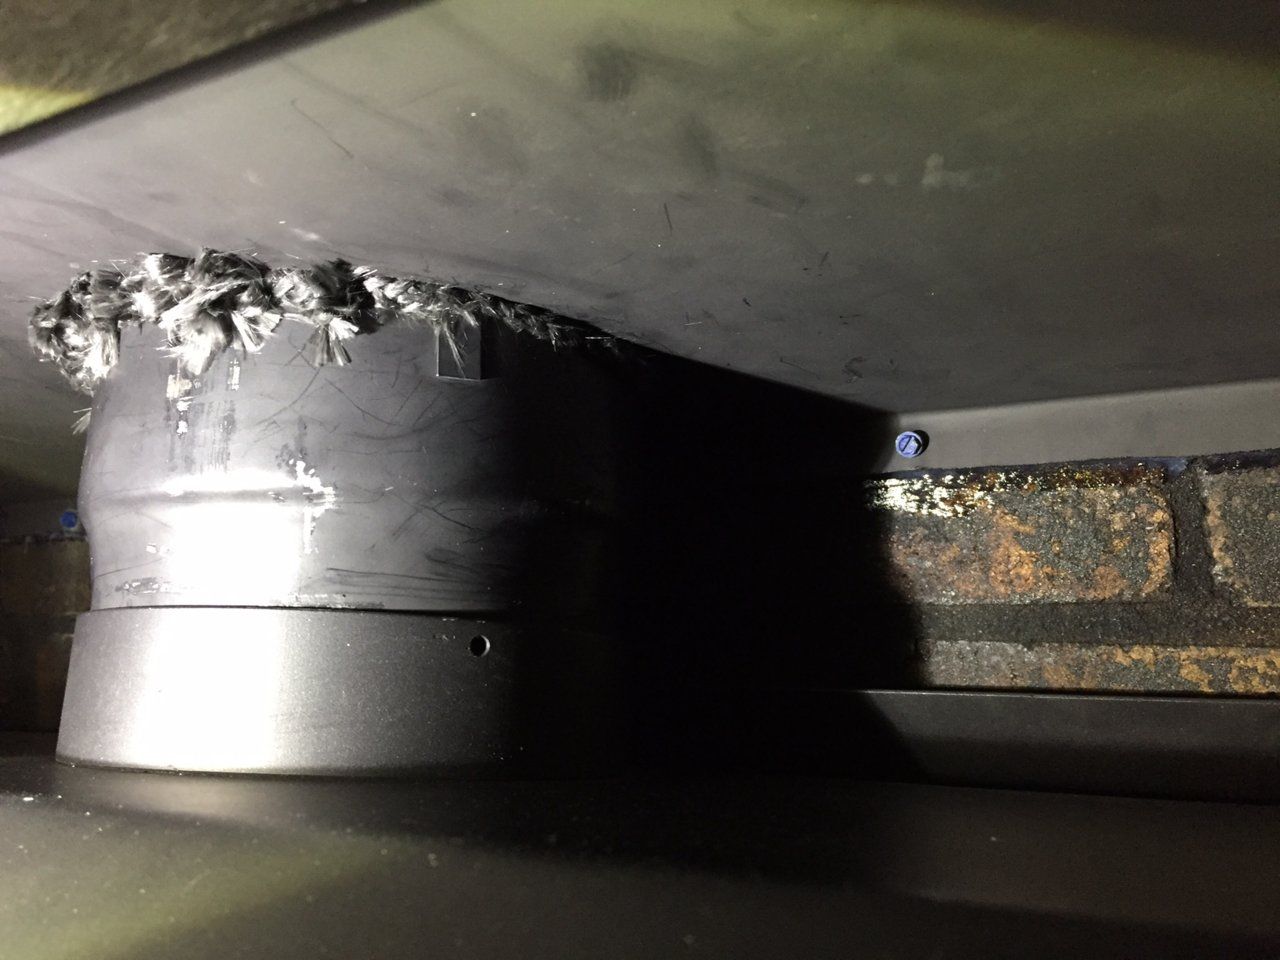
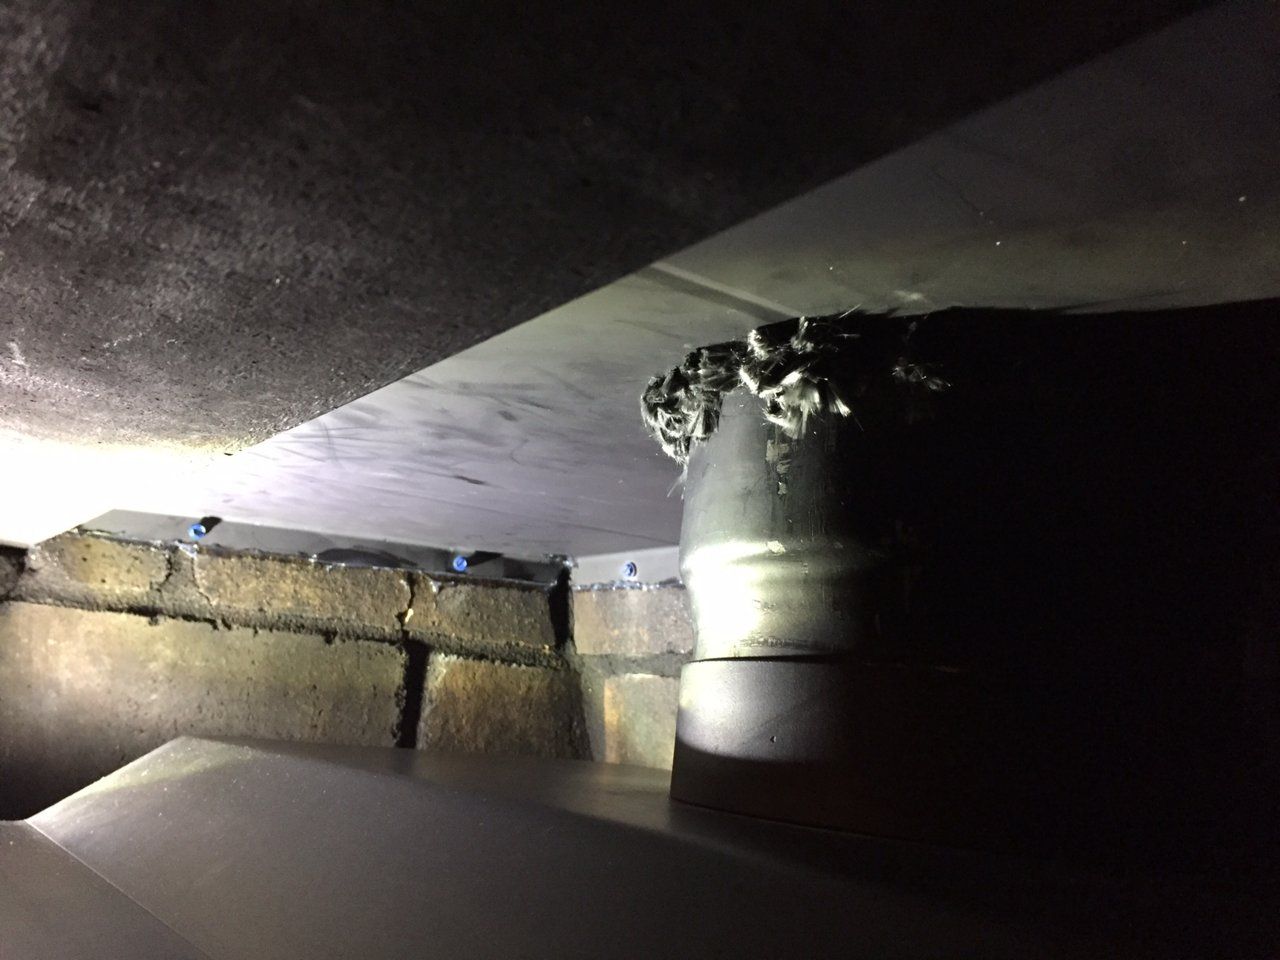
Gap between appliance connector and block off plate was filled with 2 sizes of braided gasket sealer... it's not pretty but should work, seal-wise, and is hidden visually.

Removed the damper plate, not the sides of the damper parallel to the wall. Used an angle grinder to open up damper sides enough for 6" liner.

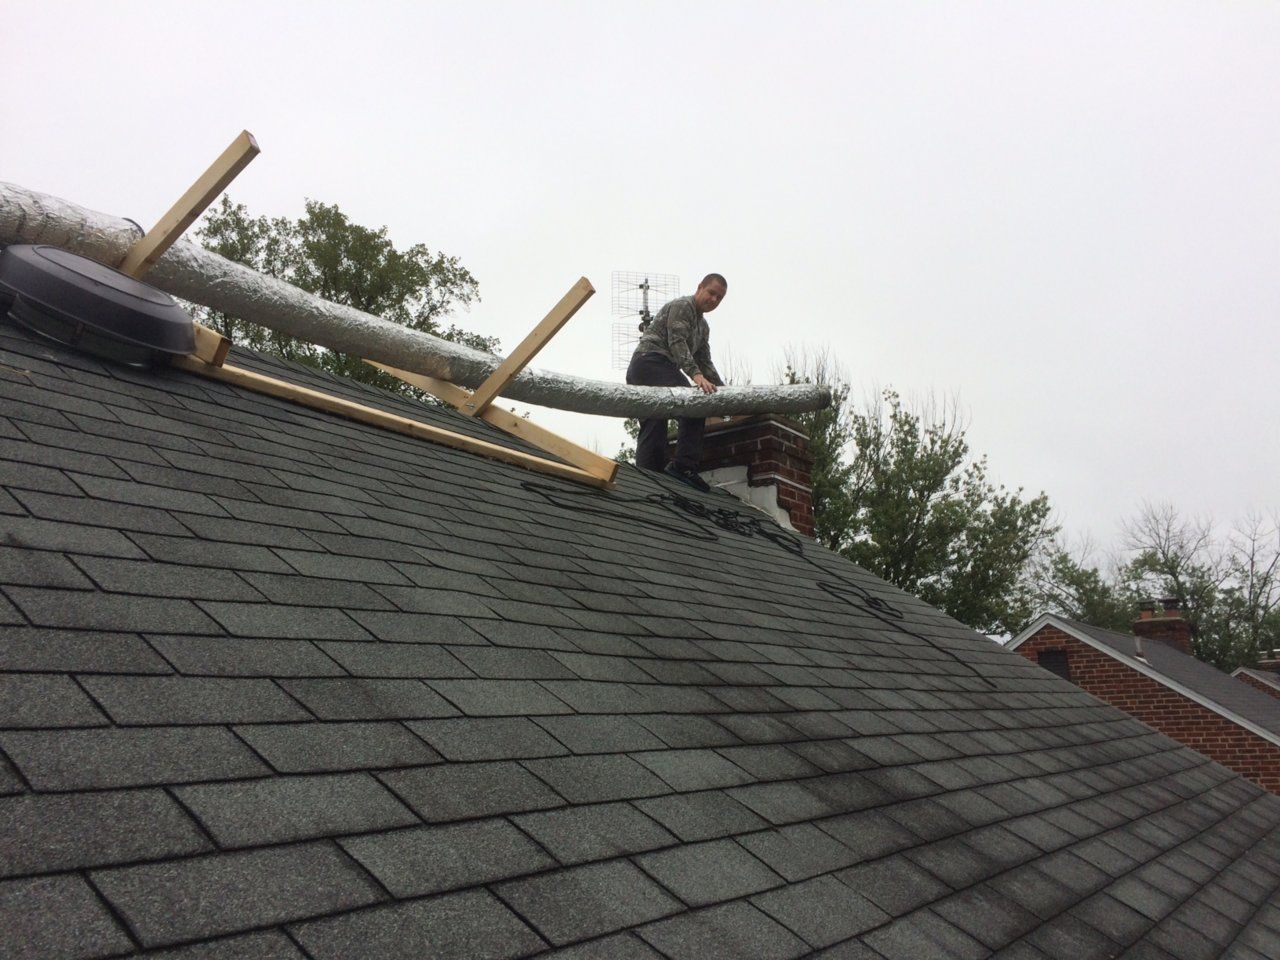
Went with the easy flex (Olympia) liner from Woodland Direct, which feels very substantial. Much heavier duty and thick than I expected. Ovalized with a 2x6" on the driveway. Liner is 23.5'+' Top 15' insulated. Insulated the whole thing and had to remove insulation for lower section on the roof because it would not fit down, but the top insulation seems to be the most important logically.

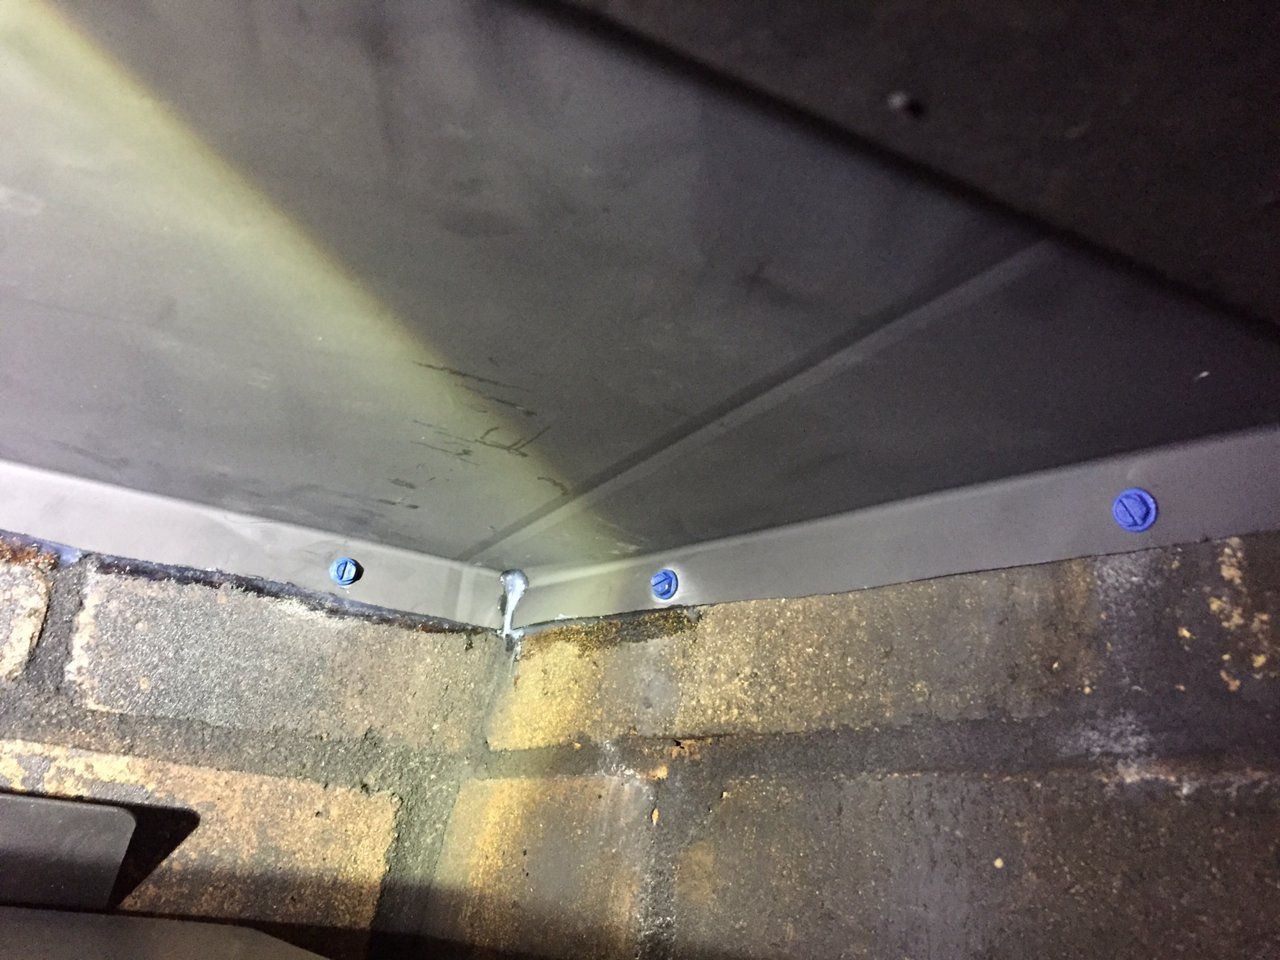
Insulated block-off plate / flue opening with roxul. Sealed with hi-temp silicone. Stove is small but have read good things about it.
 
Last edited:
Good looking job. I was looking at that stove just yesterday. Our local Menards has it in stock.
 
  • Like
Reactions: 19glendale
Nice, thanks for posting the pics illustrating the process. Let us know when you fire it up.

Did the liner adapter get screwed to the flue collar?
 
Look's good. I've had a 244 for a couple seasons. Throws very good heat. Interested in knowing what you get for burn times. Enjoy.
 
  • Like
Reactions: 19glendale
Update: I ran it on Halloween and it drafted just fine. It was around 50 degrees F, so I assume it will draft just as well in colder temps.

Also, I can't figure out how to edit the title of this thread, as I know this is not an "insert" per se, and would like to revise it.
 
Nice, thanks for posting the pics illustrating the process. Let us know when you fire it up.

Did the liner adapter get screwed to the flue collar?
No, it is just sitting in it with postive pressure, as the liner is very fixed in the area opened in the damper with the angle grinder. Had to tilt the stove into it. Did not leak at all in first fire.
 
Fantastic work! I wish I could have done such a good job. You had a challenging job, no doubt about it. Your pictures and write up provide many great tips (I had at least a few "I wish I'd thought of that!" moments). I really like the scaffold you built to support the liner on the roof ridge.

One thing- @begreen asked if you had screwed the appliance connector down. If you allow me, I'll be more direct- please get in there and put screws in. I know it seems like it's tight in the damper, but I have a good friend who thought the same thing, and it came out behind his surround, and retracted way up into the chimney. He cannot get it back together without tearing the whole thing out and redoing. It still works, but it can't be good, and he is pretty frustrated about it. I guess the heating and cooling causes a lot of expansion and contraction, and while it felt tight wedged into the damper while it was cool, it will change as it goes through a bunch of heating/cooling cycles. Adding a couple of screws after all that you have already done will be a snap.

As an aside, my buddy is a very intelligent engineer who probably should have known better, as he has a thorough understanding of materials properties, but perhaps because if this, is also pretty stubborn in his views of how things are going to work. We don't want the same thing to happen to you!
The appliance connector is screwed/attached tightly to the liner with it's integral hose clamp. The appliance connector male end is sitting in the stove attachement with positive pressure below the level of the block off plate.
 
The appliance connector is screwed/attached tightly to the liner with it's integral hose clamp. The appliance connector male end is sitting in the stove attachement with positive pressure below the level of the block off plate.
Yep, I understood that.

You can see there are holes in the stove socket, referred to as the flue collar in the manual (the round part that sticks up out of the stove that the appliance connector fits down into). That's where the screws go, and your manual indicates to screw it down there. I have a close cousin to your new stove, and my manual is explicit (see below for yours).

That bit about "positive pressure" sounds just like something my engineer buddy who lost his appliance connector up the chimney would say. I noticed it in your original post, and is exactly why I shared the story. Those screws through the socket and appliance connector apply a whole different (and highly desirable in this application!) set of forces other than gravity and friction that you are currently relying upon.

I don't want to speak for begreen, but my interpretation was that he noticed that there were no screws there in your pictures, and was gently suggesting that there should be.

In situations like this, I like to consider the downside risk of a failure compared to the benefit gained by the small effort involved in mitigating the risk. If you are hesitant to put holes in the appliance connector, don't be, it was born to have those screws through it. I used stainless self tapping sheet metal screws, and some of the experienced fellas here helped me decide which ones to use. And, they told me that they were necessary. Frankly, if I were a lawyer for SBI (the maker of your stove), I'd tell them that they had better include the correct screws with the stove that they intend to be homeowner installed.

If all this logic and anecdotal evidence fails to persuade you, trust that the makers of the stove know what they are talking about and have put it in manual. Here, I've helped out. I am forwarding the following directions, copied and pasted directly from the manual, page 43. I added the bold in case it was hard to spot.

• Each joint in the assembly must be fastened with at least three screws.
• The assembly must have allowance for expansion: elbows in assemblies allow for expansion; straight assemblies should include an inspection wrap with one end unfastened, or a telescopic section.
One end of the assembly must be securely fastened to the flue collar with 3 sheet metal screws and the other end securely fastened to the chimney.

https://sbiweb.blob.core.windows.net/media/2474/45596a_05-07-2016.pdf

Good luck!
 
Last edited:
Yep, I understood that.

You can see there are holes in the stove socket, referred to as the flue collar in the manual (the round part that sticks up out of the stove that the appliance connector fits down into). That's where the screws go, and your manual indicates to screw it down there. I have a close cousin to your new stove, and my manual is explicit (see below for yours).

That bit about "positive pressure" sounds just like something my engineer buddy who lost his appliance connector up the chimney would say. I noticed it in your original post, and is exactly why I shared the story. Those screws through the socket and appliance connector apply a whole different (and highly desirable in this application!) set of forces other than gravity and friction that you are currently relying upon.

I don't want to speak for begreen, but my interpretation was that he noticed that there were no screws there in your pictures, and was gently suggesting that there should be.

In situations like this, I like to consider the downside risk of a failure compared to the benefit gained by the small effort involved in mitigating the risk. If you are hesitant to put holes in the appliance connector, don't be, it was born to have those screws through it. I used stainless self tapping sheet metal screws, and some of the experienced fellas here helped me decide which ones to use. And, they told me that they were necessary. Frankly, if I were a lawyer for SBI (the maker of your stove), I'd tell them that they had better include the correct screws with the stove that they intend to be homeowner installed.

If all this logic and anecdotal evidence fails to persuade you, trust that the makers of the stove know what they are talking about and have put it in manual. Here, I've helped out. I am forwarding the following directions, copied and pasted directly from the manual, page 43. I added the bold in case it was hard to spot.

• Each joint in the assembly must be fastened with at least three screws.
• The assembly must have allowance for expansion: elbows in assemblies allow for expansion; straight assemblies should include an inspection wrap with one end unfastened, or a telescopic section.
One end of the assembly must be securely fastened to the flue collar with 3 sheet metal screws and the other end securely fastened to the chimney.

https://sbiweb.blob.core.windows.net/media/2474/45596a_05-07-2016.pdf

Good luck!
10-4 thank you will do asap
 
  • Like
Reactions: Easy Livin’ 3000
How did the first burn work out?
Good draft. Didn't fill it up, just split 2x4s and 2 small pieces of hardwood, so hard to judge burn time yet.
Paint curing vapor wasn't very pleasant. Probably will encounter that a couple more times. Still pretty hot here so waiting for a cold spell.
 
Also, what's the rule about cutting legs? Pretty sure that's not allowed, even though I'd be surprised if it was actually a safety hazard
 
Another reason for screwing the liner adapter, or the stove pipe in many cases, is back puffs...a bad one will blow the pipe right apart. Most people don't have issues with this normally...but it happens...and it can be scary enough as is let alone if you are wondering if your chimney pipe is gonna come off and spew sparks/smoke/fire all over the house...
 
  • Like
Reactions: begreen
You will likely find that the primary air control system is somewhat inefficient. After establishing a strong fire I try to shut down the air asap. After a good coal base is established I can usually reload and immediately shut the primary air down to 1/4. I let the reload start slowly, and burn slowly. Otherwise it takes off and eats wood like candy!
I have tried a few different ways of slowing down the primary/secondary air supply to retard the fast burn. Picture crumpled tinfoil in the primary and secondary intakes. Makes a heck of a differance. Likely not a approved method!
The cut off legs likely is not a huge concern. This stove has a suspended heat shield on the bottom. Rarely measure floor temps of any concern. Hot wall temps are another story! If you need a link to a reasonable fan option shoot me a pm.
 
  • Like
Reactions: 19glendale
You will likely find that the primary air control system is somewhat inefficient. After establishing a strong fire I try to shut down the air asap. After a good coal base is established I can usually reload and immediately shut the primary air down to 1/4. I let the reload start slowly, and burn slowly. Otherwise it takes off and eats wood like candy!
I have tried a few different ways of slowing down the primary/secondary air supply to retard the fast burn. Picture crumpled tinfoil in the primary and secondary intakes. Makes a heck of a differance. Likely not a approved method!
The cut off legs likely is not a huge concern. This stove has a suspended heat shield on the bottom. Rarely measure floor temps of any concern. Hot wall temps are another story! If you need a link to a reasonable fan option shoot me a pm.
Is the front or back considered primary? On the back, where did you put the crumpled tin foil, ie. is the opening towards the sky or the floor, or the sides? thanks
 
Primary is the upper right sliding adjuster in front. My secondary air is on the backside. I tried foil above the door in front as well as the rear inlet. Your newer stove may have the secondary inlet on the bottom towards the rear instead of the backside. Seems that I saw that change in a online owners manual. I tried using magnets to hold a strip of tin over the primary and secondary also. Magnets fell off when the stove got good and hot! Finally gave up on messing with it. I got better at shutting down the air quicker to prolong the burn.
 
  • Like
Reactions: 19glendale
It's a good idea to not tinker with the stoves tested configuration unless there are unusual conditions for the install like a very tall flue.
 
Primary is the upper right sliding adjuster in front. My secondary air is on the backside. I tried foil above the door in front as well as the rear inlet. Your newer stove may have the secondary inlet on the bottom towards the rear instead of the backside. Seems that I saw that change in a online owners manual. I tried using magnets to hold a strip of tin over the primary and secondary also. Magnets fell off when the stove got good and hot! Finally gave up on messing with it. I got better at shutting down the air quicker to prolong the burn.
Thanks, I just wasn't sure which was considered which, I knew there were 2. What type of wood are you burning primarily?
 
It's a good idea to not tinker with the stoves tested configuration unless there are unusual conditions for the install like a very tall flue.
What qualifies (or quantifies) as a "very tall flue"?
 
Over 30ft. unless the house is at high altitude. 90º turns in the flue path will reduce effective height by roughly by about 3' per 90º turn.
 
I burn varieties of Maple, Elm, Ash, Oak, Mulberry, Cottonwood and yes pine!
 
Status
Not open for further replies.