So there I was - beautiful river flowing behind me. Me swinging at a round like I was trying to kill a rabid beaver - sweating, ticked off, tired. Heck, I am only making camp fire wood. "Screw this - I am building another splitter for the cabin", entered my mind.
SOoooo....
The idea was a smaller, lighter duty machine with good speed and I didn't want to spend a bunch of bean pods on it. There were a couple of items that I needed to buy, but mostly I could repurpose some steel, wheels, hoses that I have around anyhow. I literally have bins full of bolts, nuts, washer, etc. The most exotic piece of equipment I used for this build was a die grinder. I roughly have about 20 hrs in the build and I don't have plans. This is farmer style. Looks good, tack it on.
First person to pick on my welding gets banned from the island.
Specs:
14.5 HP briggs electric start. (donor from a lawn mower with locked up diff.)
3.5" - 16" stroke ram. (had laying on shelf) splitter has 2 inched between foot and wedge for total log length of 18"
16 gpm speeco 2 stage pump
non detent control valve.
Repurposed air tank from semi tractor.
Purchased parts:
I-beam - $100
pump - $107
half of a lovejoy and spider - $20
A few pieces of 1" pipe - $5
It is not complete yet, but I don't believe I will need any other purchased parts. Maybe a hose if I don't have the proper size already hanging on the wall.
I will start from the beginning.
The first part to design was the shoe or shuttle. This will be a wedge on beam splitter. It will also be a fairly tall splitter as I don't see this getting rounds any bigger than 18-20".
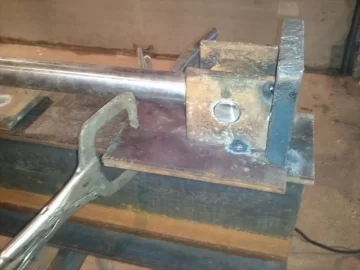
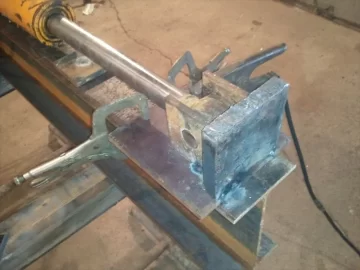
Continuing stages of shuttle and of the wedge. Again - I aim to be cheap on this build, hence the built wedge.
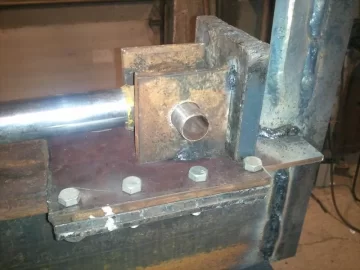
The cutting edge of the wedge was roughed in with a torch and finished with an angle grinder. Trust me when I tell you that this is not a fast process.
Mocking up the fit of the cylinder and building the rear mount:
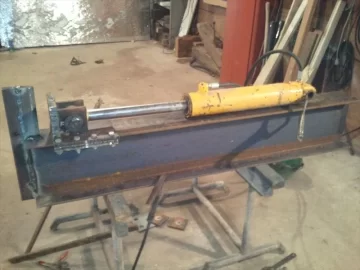
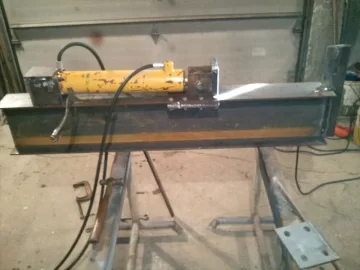
You may have noticed that I left the room behind the rear mount. If at any time a longer cylinder was wanted, you could simply cut off the rear mount and move back.
Burning some rod. This was some heavy penetration on the welds. I don't promise "pretty", but I do promise that they will hold. I didn't have quite a large enough drill bit, so I enlarged the holes with a die grinder. 1-1/4 rod for pins.
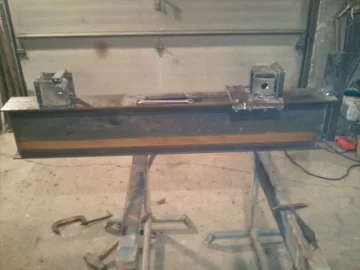
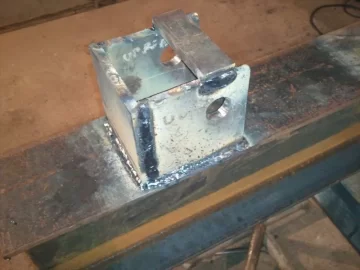
Mockup of motor mount/pump mount, axle position and checking weight distribution:
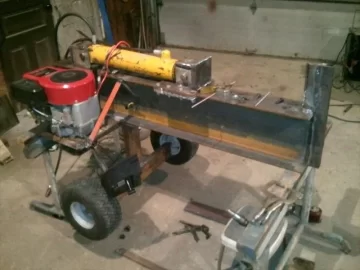
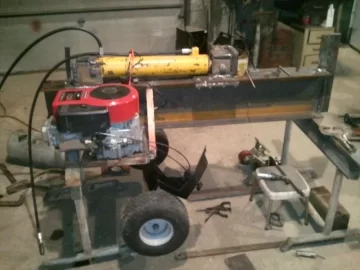
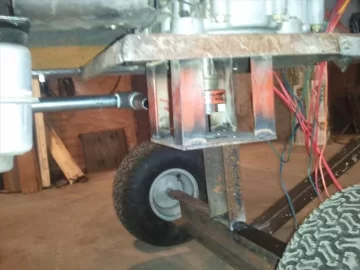
Controls are mounted (this is a better pic of the pump mount, as well). As you can see, this was part of the dash from the donor mower. The wheels were also repurposed from the same mower. Gas tank mounted. And a pic of it sitting on its own wheels and leg. Note the draw bar hanging from the front of the splitter. I built it to be removable for a couple of reasons. One - eliminates a tripping hazard and two - it makes this sucker tough to steal. You can't hook it up to anything to tow it if the tow bar isn't there.
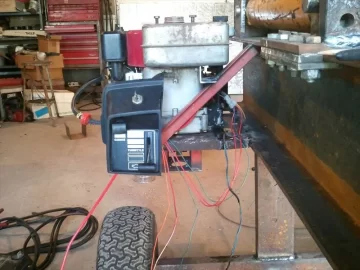
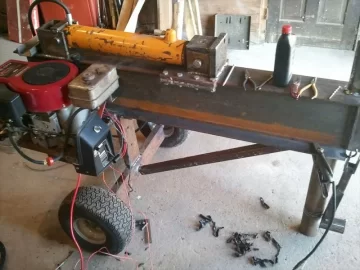
At this point in time, the motor is mounted and running and its time to start plumbing and mounting the control valve. I probably need about 4 more hours to get that done (and battery mount, too). So to tally so far - and including a 5 gallon bucket of hydro fluid, I am around $250 bucks. This thing is built to specs that should give me performance of the Iron and Oak 15 ton horizontal machine. I am using a much heavier beam and a 2" shorter ram and a bigger motor, but It should be a 6-8 second full cycle time.
The tongue weight is VERY reasonable, but I plan on mounting a small outfeed table that will add a few pounds (and that is probably a good thing).
It is quite stable for being taller than most. This will have a beam height about the same as the Super splitters, for ease of production of rounds. I am sure I missed some stuff.
One of the reasons for this thread (besides the obvious need for praise ) was to show People that this can be done and on a budget. I have seen many posts, both here and elsewhere telling people that they will have just as much cash in a homebuilt as they would if they went and bought one. Baaaa. Even my big boy splitter came in at under $600 and that sucker is comparable to any $2000+ machine out there (hydro type).
Used hydro cylinders are aplenty.
Motors are all over the place in the form of used/retired/broke mowers, rototillers, power washers, generators, etc.
Some things are not so easy. Beams, control valves , hoses, pump are the typical purchase items. I have $100 into the beam, $107 into the pump and I had a control valve (a brand new one can be had from fleebay for about $60.) and some hoses. I bought one half of the lovejoy (had the other on hand) and the spider for the lovejoy - less than $20. And $34 in a 5 gallon bucket of hydro fluid. $261 bucks so far and the only thing I MIGHT have to buy from here on out is a hose or two if I don't have a match.
I used what I had/have. Does the axle and uprights need to be 4" channel - no, they could just as easily been made out of pipe. Scrap pipe is EVERYWHERE. If your not afraid to ask or look, steel drop offs can be had for scrap price in many shops around the country. Get your network going. It took me a little time to source everything, but I was in no great hurry. Once all the pieces are in order it just takes some shop time to stick it together.
Tools used to get this done were:
Welder
Torch
Die grinder
Angle head grinder
Hand tools.
Metal chop saw.
Nothing exotic in the mix. If you don't have those tools - get them.

IT'S ALIVE
With the exception of the work table, I believe that I am 'bout done with it. I got it all plumbed up, wired up, fired up and even split a few rounds with it. I set the relief at 2400 PSI, but I might adjust that a wee bit. Turns out to have a 10 second total cycle time. The rounds were pretty easy white oak and she worked those up in short order. The plumbing is a little "busy" because of the use of whatever I had on hand. I MAY decide to buy a couple of hoses, just to clean it up a bit.
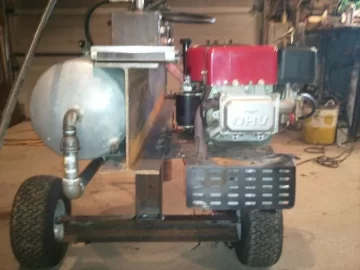
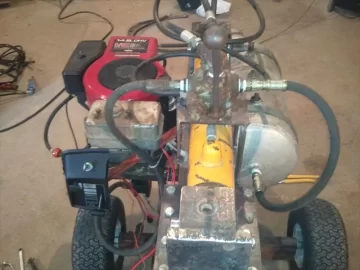
As you can see, it has a pretty large muffler for the 14HP. It is actually pretty quite to run.
A couple more pics and proof of it working.
Just reminded myself of a couple of 1" pipe pieces I had to purchase. $15
New total - $276
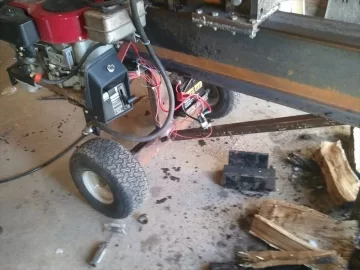
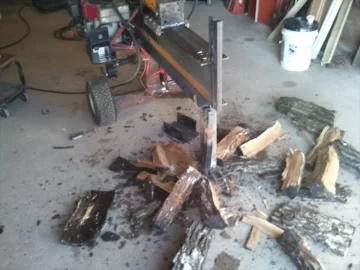
My big concern was the 3/8" inputs to the cylinder. It appears that I was worried over nothin'. At no load it didn't even register on my gauge, pushing all 16 GPM through those hoses. I will need to put a couple more gallons of hydro juice in the tank. 5 gallons doesn't cover the return hose by much and I would like to get more juice on top of it to prevent aeration.
Since this motor and the tractor it came off of has the ability for headlights, I may choose to put a work light on the beast, as well.
This essentially concludes the build. About 25 shop hours (I did it on a weekend). It works very well. About 15 tons of force @ 10 second full cycle time. It has stopped on a couple of rounds, but a quick reposition yields success. Nothing has defeated it yet.
SOoooo....
The idea was a smaller, lighter duty machine with good speed and I didn't want to spend a bunch of bean pods on it. There were a couple of items that I needed to buy, but mostly I could repurpose some steel, wheels, hoses that I have around anyhow. I literally have bins full of bolts, nuts, washer, etc. The most exotic piece of equipment I used for this build was a die grinder. I roughly have about 20 hrs in the build and I don't have plans. This is farmer style. Looks good, tack it on.

First person to pick on my welding gets banned from the island.

Specs:
14.5 HP briggs electric start. (donor from a lawn mower with locked up diff.)
3.5" - 16" stroke ram. (had laying on shelf) splitter has 2 inched between foot and wedge for total log length of 18"
16 gpm speeco 2 stage pump
non detent control valve.
Repurposed air tank from semi tractor.
Purchased parts:
I-beam - $100
pump - $107
half of a lovejoy and spider - $20
A few pieces of 1" pipe - $5
It is not complete yet, but I don't believe I will need any other purchased parts. Maybe a hose if I don't have the proper size already hanging on the wall.
I will start from the beginning.
The first part to design was the shoe or shuttle. This will be a wedge on beam splitter. It will also be a fairly tall splitter as I don't see this getting rounds any bigger than 18-20".


Continuing stages of shuttle and of the wedge. Again - I aim to be cheap on this build, hence the built wedge.

The cutting edge of the wedge was roughed in with a torch and finished with an angle grinder. Trust me when I tell you that this is not a fast process.
Mocking up the fit of the cylinder and building the rear mount:


You may have noticed that I left the room behind the rear mount. If at any time a longer cylinder was wanted, you could simply cut off the rear mount and move back.
Burning some rod. This was some heavy penetration on the welds. I don't promise "pretty", but I do promise that they will hold. I didn't have quite a large enough drill bit, so I enlarged the holes with a die grinder. 1-1/4 rod for pins.


Mockup of motor mount/pump mount, axle position and checking weight distribution:


Controls are mounted (this is a better pic of the pump mount, as well). As you can see, this was part of the dash from the donor mower. The wheels were also repurposed from the same mower. Gas tank mounted. And a pic of it sitting on its own wheels and leg. Note the draw bar hanging from the front of the splitter. I built it to be removable for a couple of reasons. One - eliminates a tripping hazard and two - it makes this sucker tough to steal. You can't hook it up to anything to tow it if the tow bar isn't there.


At this point in time, the motor is mounted and running and its time to start plumbing and mounting the control valve. I probably need about 4 more hours to get that done (and battery mount, too). So to tally so far - and including a 5 gallon bucket of hydro fluid, I am around $250 bucks. This thing is built to specs that should give me performance of the Iron and Oak 15 ton horizontal machine. I am using a much heavier beam and a 2" shorter ram and a bigger motor, but It should be a 6-8 second full cycle time.
The tongue weight is VERY reasonable, but I plan on mounting a small outfeed table that will add a few pounds (and that is probably a good thing).
It is quite stable for being taller than most. This will have a beam height about the same as the Super splitters, for ease of production of rounds. I am sure I missed some stuff.
One of the reasons for this thread (besides the obvious need for praise
 ) was to show People that this can be done and on a budget. I have seen many posts, both here and elsewhere telling people that they will have just as much cash in a homebuilt as they would if they went and bought one. Baaaa. Even my big boy splitter came in at under $600 and that sucker is comparable to any $2000+ machine out there (hydro type).
Used hydro cylinders are aplenty.
Motors are all over the place in the form of used/retired/broke mowers, rototillers, power washers, generators, etc.
Some things are not so easy. Beams, control valves , hoses, pump are the typical purchase items. I have $100 into the beam, $107 into the pump and I had a control valve (a brand new one can be had from fleebay for about $60.) and some hoses. I bought one half of the lovejoy (had the other on hand) and the spider for the lovejoy - less than $20. And $34 in a 5 gallon bucket of hydro fluid. $261 bucks so far and the only thing I MIGHT have to buy from here on out is a hose or two if I don't have a match.
I used what I had/have. Does the axle and uprights need to be 4" channel - no, they could just as easily been made out of pipe. Scrap pipe is EVERYWHERE. If your not afraid to ask or look, steel drop offs can be had for scrap price in many shops around the country. Get your network going. It took me a little time to source everything, but I was in no great hurry. Once all the pieces are in order it just takes some shop time to stick it together.
Tools used to get this done were:
Welder
Torch
Die grinder
Angle head grinder
Hand tools.
Metal chop saw.
Nothing exotic in the mix. If you don't have those tools - get them.

IT'S ALIVE
With the exception of the work table, I believe that I am 'bout done with it. I got it all plumbed up, wired up, fired up and even split a few rounds with it. I set the relief at 2400 PSI, but I might adjust that a wee bit. Turns out to have a 10 second total cycle time. The rounds were pretty easy white oak and she worked those up in short order. The plumbing is a little "busy" because of the use of whatever I had on hand. I MAY decide to buy a couple of hoses, just to clean it up a bit.


As you can see, it has a pretty large muffler for the 14HP. It is actually pretty quite to run.
A couple more pics and proof of it working.

Just reminded myself of a couple of 1" pipe pieces I had to purchase. $15
New total - $276


My big concern was the 3/8" inputs to the cylinder. It appears that I was worried over nothin'. At no load it didn't even register on my gauge, pushing all 16 GPM through those hoses. I will need to put a couple more gallons of hydro juice in the tank. 5 gallons doesn't cover the return hose by much and I would like to get more juice on top of it to prevent aeration.
Since this motor and the tractor it came off of has the ability for headlights, I may choose to put a work light on the beast, as well.
This essentially concludes the build. About 25 shop hours (I did it on a weekend). It works very well. About 15 tons of force @ 10 second full cycle time. It has stopped on a couple of rounds, but a quick reposition yields success. Nothing has defeated it yet.

